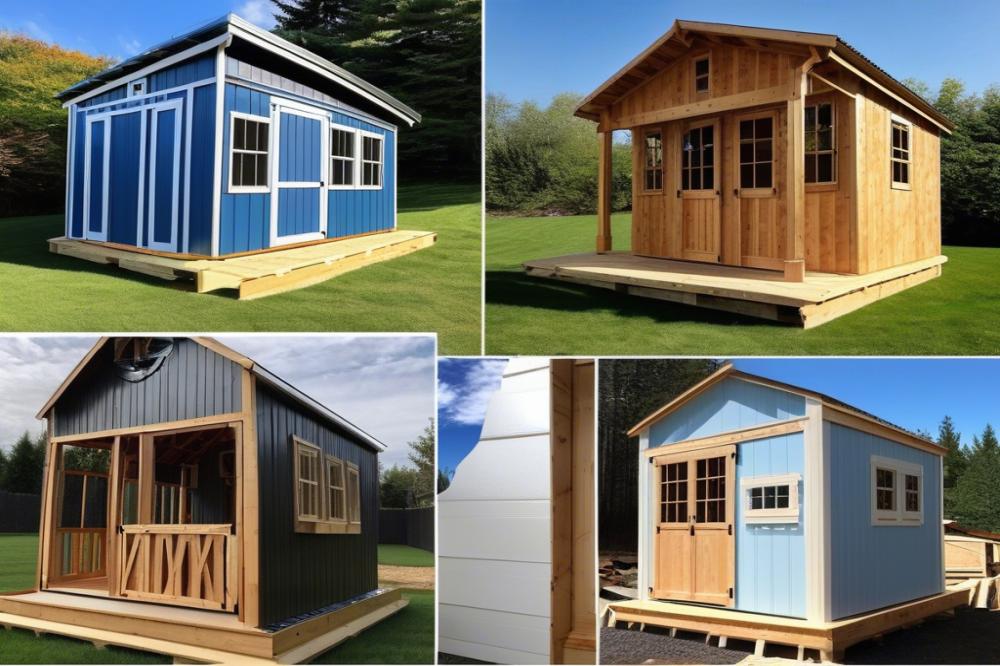
Introduction
Building a shed is more than just creating a space for outdoor storage. It serves as a refuge for tools, equipment, and various items that need protection. In regions prone to harsh weather, having a durable shed becomes essential. Strong winds, heavy rain, and snow can wreak havoc on poorly built structures. Therefore, it’s vital to prioritize durability in the design and construction process.
Thoughtful shed construction enhances longevity and functionality. Selecting the right materials significantly impacts how well your shed can withstand the elements. Using quality wood or metal, along with appropriate weatherproofing methods, safeguards your possessions and the structure itself. The roofing choice is equally important, as it must shed water efficiently to prevent leaks.
Several key factors contribute to successfully building a robust structure. Start with a solid foundation, which provides stability and protects against moisture. Additionally, insulation plays a role in temperature regulation, making the space usable throughout the year. Proper ventilation prevents mold growth, helping to maintain air quality inside the shed. Regular maintenance cannot be overlooked either; it ensures the shed remains in excellent condition over time.
Lastly, while the idea of constructing a shelter may seem daunting, a DIY shed project can foster creativity and self-reliance. With careful planning and attention to detail, anyone can create a space that endures the elements. Take the time to consider all these factors for a shed that serves you well for years to come.
Understanding durable shed Construction
Defining What Makes a Shed Durable
A durable shed withstands harsh weather and lasts for years. It begins with high-quality materials. Strong wood, metal, or composite options provide resilience against the elements. Durability also comes from good design. Features like reinforced windows and sturdy doors play a critical role. An effective foundation prevents shifting during storms or heavy snowfall. Without a proper base, the entire shed can succumb to wear.
Overview of Essential shed construction Techniques
Shed construction requires careful planning. First, choose the right location. This choice impacts stability and accessibility. Then, gather all necessary materials for the project. Quality plywood, treated lumber, and durable metal are all key. Building a strong roof is vital for protection. It must shed water efficiently while resisting winds. Insulation is often overlooked but important in retaining heat.
When putting together the walls, frame them securely. Use bolts or screws for sturdy connections. Weatherproofing adds a layer of protection and ensures long-lasting quality. Apply paint or a sealant to prevent moisture damage. Effective ventilation prevents mold and keeps the air fresh. Considering these aspects will result in a reliable storage solution.
Importance of Solid Design and Structural Integrity
Solid design promotes longevity. The shape of the roof can make a difference in weather situations. A steep slope encourages rain to run off quickly. Structural integrity is also vital. Upgrading to heavier framing can resist strong winds remarkably well. Don’t forget about maintenance. Regular checks on roofing and woodwork prevent prolonged damage. Provide adequate outdoor storage that withstands seasonal changes.
Taking these factors into account leads to a practical and robust solution. A strong shed protects your belongings from the unpredictable nature of weather. With the right steps, a DIY shed can become a lasting feature of your outdoor space.
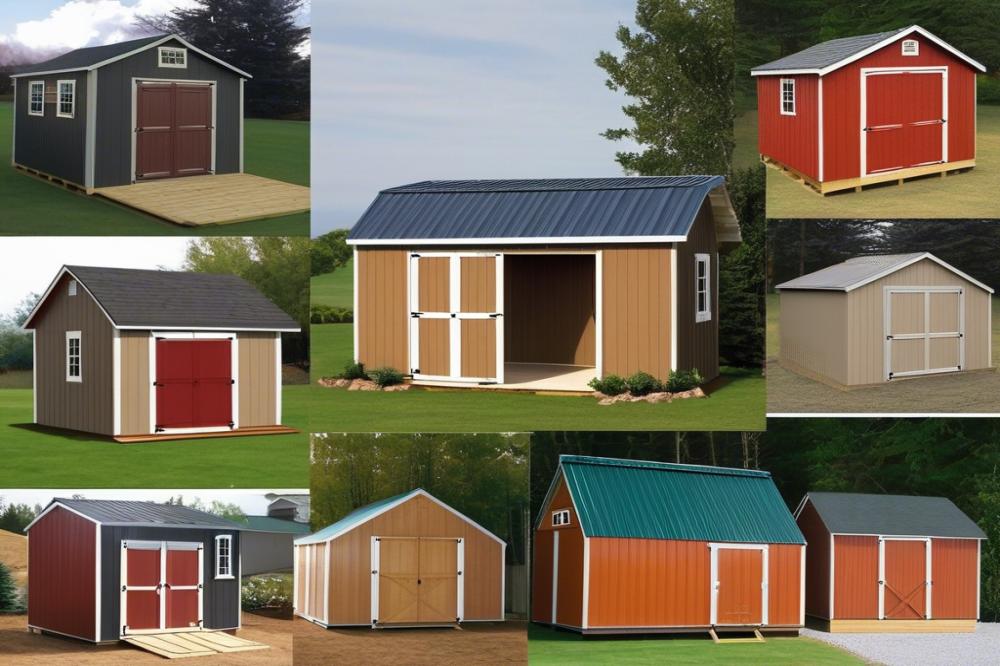
Selecting the Right Materials
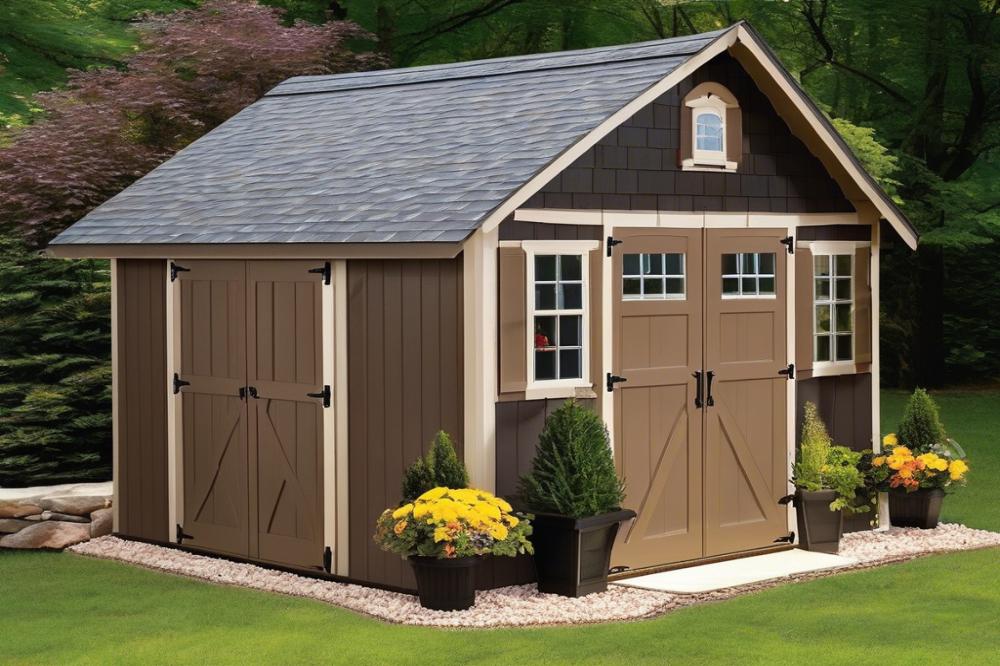
Choosing the right materials is crucial for any shed construction project, especially in areas prone to harsh weather. A variety of options are available, and each material comes with its own set of strengths and weaknesses. Builders must consider how each material will stand up to wind, rain, snow, and other elements.
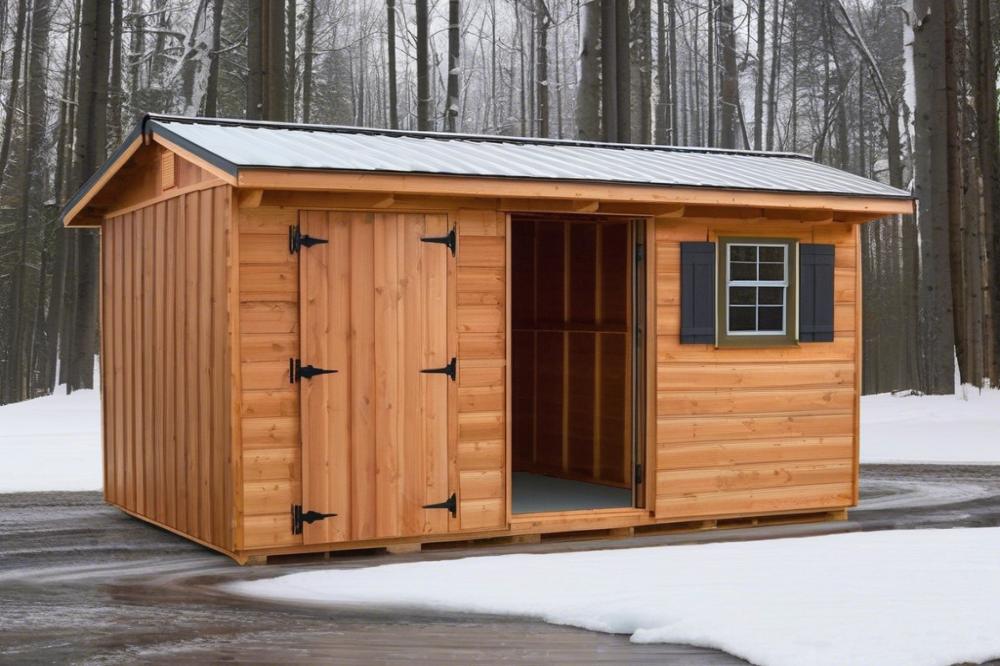
Wood Options
Wood is a traditional choice for outdoor storage structures. It offers great aesthetics and can blend nicely with surroundings. However, wood needs proper weatherproofing to resist moisture. A strong foundation is essential, as rot can occur if it remains damp. Pressure-treated wood enhances durability but still requires regular maintenance. Rain and snow can warp untreated sections if not managed well.
Metal: Strength in Adversity
Metal sheds provide unmatched durability against the elements. They are usually made from galvanized steel or aluminum, making them resistant to rust. Metal roofs can survive heavy snowfall without collapsing, thanks to their structural integrity. Insulation options are essential for those using their sheds year-round. Even though metal can get hot in the sun, proper ventilation helps mitigate this issue.
Vinyl Sheds: Low Maintenance
Vinyl offers a modern alternative to traditional materials. These sheds are lightweight yet robust, making them easy to assemble. They require minimal maintenance since vinyl doesn’t rust or rot. However, extreme temperatures can affect the material. Proper roofing is necessary to keep water out and maintain the structure’s lifespan.
Importance of Weather-Resistant Materials
Weather-resistant materials play a critical role in ensuring the longevity of your structure. Selecting options that withstand heavy winds, rain, and fluctuating temperatures can save time and money in the long run. While aesthetics may be a concern, functionality should remain at the forefront. DIY shed projects must prioritize building a reliable shelter that protects tools and equipment from the elements. Weatherproofing techniques further enhance these materials’ effectiveness, promoting this structure’s usefulness.
Weatherproofing Techniques
Building a strong and durable shed involves more than just basic construction. Effective weatherproofing is critical in protecting your outdoor storage from harsh elements. Rain, snow, wind, and extreme temperatures can cause significant damage if left unaddressed. Weatherproofing is essential to prolong the life of your shed and keep your belongings safe.
Methods for Sealing and Protecting Against Moisture
Moisture is a common enemy for any structure. To combat this, proper sealing methods should be implemented during shed construction. Start with a solid foundation. Concrete blocks or a treated wood base will help keep your shed elevated and dry. Proper drainage around the foundation is equally important. It prevents water pooling around the base.
Next, focus on the roofing. Metal or asphalt shingles are often effective choices. They resist water infiltration better than other materials. Using a waterproof membrane underneath the shingles adds an extra layer of protection. Sealing all joints and seams with quality caulk will prevent leaks. Additionally, ensure that doors and windows have weather stripping. This will help keep moisture from entering.
Use of Weather-Resistant Treatments and Finishes
Treatments can play a vital role in enhancing the durability of the materials used in your DIY shed. Applying water-repellent wood stains or sealants can protect against rot and decay. Pressure-treated wood resists moisture and insect damage, extending the life of your shed. Consider using a weather-resistant finish on metal components to prevent rust.
Insulation is also a key player in maintaining a stable environment inside your shed. It helps keep humidity levels down, minimizing moisture buildup. Ventilation systems should not be overlooked. They allow air to flow freely, which is essential in preventing mold and mildew.
Finally, regular maintenance is necessary to ensure that your shed remains in top condition. Check for signs of wear, reapply finishes when needed, and address any leaks immediately. These steps can help make your shed a reliable storage solution for years, even in tough weather.
Constructing a Robust Foundation
Building a durable shed requires a strong foundation. This part of the construction prevents shifting or settling when harsh weather strikes. A solid base also protects your outdoor storage from moisture and pests, extending the lifespan of your shed. Think of it as the backbone of your project, supporting everything that follows.
Importance of a Strong Foundation for Durability
A sturdy foundation keeps your shed level and secure. When winds howl or heavy rains fall, it must stand firm. A well-constructed base resists rot and degradation, critical for long-term use. Lack of proper footing can lead to costly repairs down the road. Remember, the foundation has a huge role in your shed’s overall stability.
Types of Foundations Suitable for Harsh Weather
Several types of foundations can suit harsh conditions. Concrete slabs are one option. They provide a solid, flat surface that can handle weight and moisture. Another choice is treated wood skids. They elevate the shed, allowing for airflow beneath. This helps prevent rot by keeping the base dry. Concrete piers offer a third option, raising your structure off the ground, which adds protection against flooding.
Step-by-Step Guide to Building a Weatherproof Foundation
Begin by selecting the right location for your shed. A dry and level area is ideal. Clear away any debris, plants, or rocks to create a clean workspace. For a concrete slab, dig a shallow trench around the perimeter. Next, pour a gravel base to help with drainage and stability.
After the gravel is in place, mix and pour concrete into the slab frame you’ve created. Ensure it’s level and smooth. If using treated wood skids, lay the skids parallel and level them off. For concrete piers, dig holes at intervals, set the forms, and pour concrete into them.
Once the concrete is cured, check for any uneven points. Add adjusters if needed. Now it’s time for weatherproofing. You can apply sealant around the edges and any points where water might enter. Installing proper ventilation is also vital to allow airflow and reduce moisture buildup, especially in wetter climates.
Finally, remember to inspect the foundation regularly. Maintenance is key to long-lasting durability. Keep an eye out for cracking or settling, and address any problems promptly. Following these steps leads to a reliable foundation for your DIY shed that will stand strong for years.
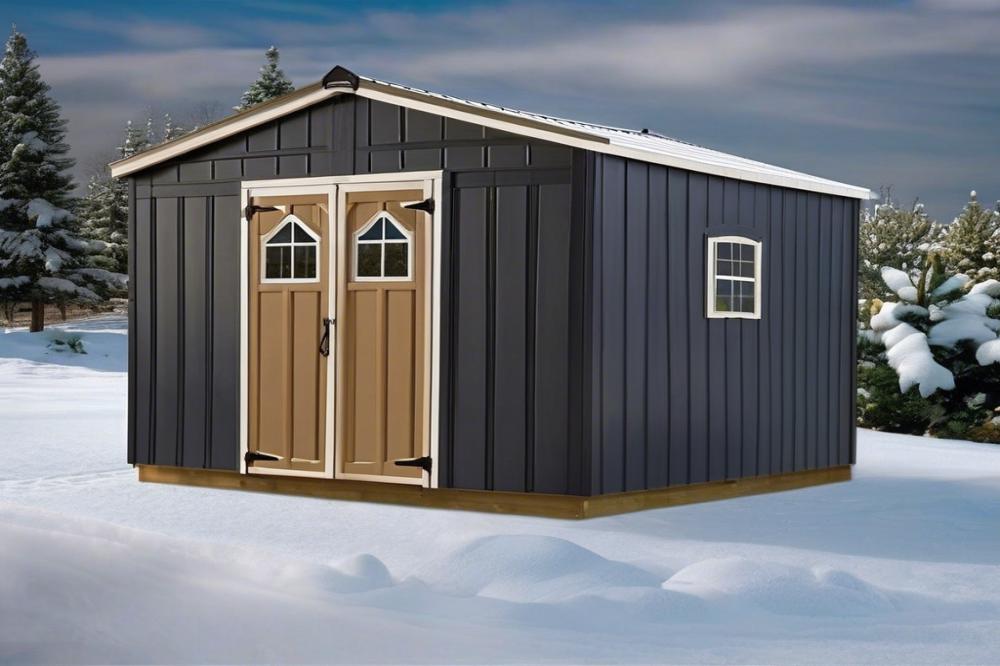
Choosing the Right Roofing
Selecting the appropriate roofing material is vital for a shed intended to endure harsh weather. Many options exist, and each comes with its own benefits. Metal roofing, for example, resists strong winds and heavy rain. Asphalt shingles also provide value but may not offer the longevity of metal. Wood shingles have a charming look, yet they require more maintenance. Fiberglass panels can be useful for snowy or rainy areas, allowing light while keeping moisture out.
The pitch of the roof plays a significant role in how effectively it sheds water and snow. A steep pitch allows snow to slide off, reducing the weight on the structure. Moreover, this prevents leaks that can result from melting snow pooling on a flat roof. Regularly checking the roof’s drainage system helps keep it functioning well. Gutters and downspouts must be clear of debris to allow water to flow freely.
Installing the roof properly is essential for long-term durability and weatherproofing. Begin by laying an underlayment as a protective barrier against moisture. Secure the roofing material tightly to avoid any loose areas that could allow leaks. Overlapping materials can also add an extra layer of security. In windy conditions, consider adding extra fasteners for stability. Always follow the manufacturer’s instructions when undertaking DIY shed construction. This attention to detail can prevent bigger problems down the line.
Consider insulation and ventilation for your shed. This helps regulate temperature and prevents moisture buildup inside. Properly positioning vents allows air to circulate and keeps items in outdoor storage dry. Finally, plan for routine maintenance to extend the life of the roofing. Inspecting for loose materials or signs of wear can save you from costly repairs later.
Insulation Strategies for Harsh Climates
Insulation plays a critical role in the construction of any shed that will face extreme conditions. Proper insulation helps to regulate temperature and keeps the environment inside the shed stable. This is especially important for those using their shed for outdoor storage. Insulation acts as a barrier against the elements, helping to prevent heat loss in winter and heat gain in summer.
Best Insulation Materials for Temperature Regulation
When it comes to choosing materials, several options stand out. Foam board insulation is one effective choice for its high R-value, which measures thermal resistance. Another great option is fiberglass batts, designed to be fitted between the shed’s studs. This material is both affordable and easy to install. Reflective insulation is another smart option, reflecting heat away from the interior, keeping it cooler in the summer months.
Spray foam insulation is also popular, as it expands to fill gaps and cracks, sealing off any areas where cold air might seep in. For those who prefer more eco-friendly options, recycled denim insulation can offer decent thermal properties while being gentle on the environment. Each of these materials provides unique benefits tailored to different needs and budgets.
Installation Tips for Effective Insulation
Effective installation of insulation is just as important as the materials you choose. Begin by sealing any leaks around windows and doors before you apply insulation. This step is essential to ensure maximum efficiency. Pay close attention to corners and joints where air might sneak in. If using fiberglass, wear protective gear to avoid irritation during installation.
Understanding the shed’s design also helps. For instance, it’s wise to install the insulation in layers in places like the roof and walls. Adequate ventilation should not be ignored as well. Proper airflow helps prevent moisture buildup, which can weaken the shed’s structure over time. While working on the roofing, consider adding insulation to the ceiling for extra protection.
Regular maintenance will keep your insulation in top shape. After heavy rains or storms, check for water damage or signs of mold. Address any issues immediately to maintain a durable structure. A well-insulated structure does more than regulate temperature; it contributes to a longer lifespan for your DIY shed.
Ventilation Solutions
Proper ventilation is crucial when it comes to shed construction. It allows fresh air to flow easily inside, helping to regulate temperature. Without good airflow, problems can arise. Warm air, moisture, and trapped heat can create an unhealthy environment. This could lead to damage of your outdoor storage items and lead to mold growth over time.
There are several ways to achieve adequate air circulation in your shed. Installing vents near the roofline will allow hot air to escape. Consider using soffit vents that promote airflow from below. Another option includes adding windows. They can be opened to create cross-breezes, especially if your DIY shed design incorporates a layout that encourages it. Screens can be fitted on windows to keep unwanted pests outside.
Moisture buildup is a common issue in poorly ventilated spaces. This leads to the growth of mold, which can ruin valuable items. Ensuring there is a layer of insulation in the walls and ceiling can help manage temperature differences inside. These materials control the internal environment. Additionally, selecting weatherproofing techniques for your roofing can reduce condensation as well.
Regular maintenance of ventilation systems within the shed contributes to its durability. Check vents frequently for blockages like dirt or debris. Keeping them clear supports natural airflow. Fresh air will be able to circulate effectively, decreasing humidity. Utilizing these strategies not only extends the life of your shed but keeps your belongings safe.
Maintenance Tips for Longevity
Regular maintenance is essential for keeping your shed in good shape. Make it a habit to inspect your structure at least twice a year. Look for signs of wear, such as cracked wood or rusted metal. Over time, materials can degrade due to the elements. A quick visual check can help you spot issues early.
Seasonal Checklists for Inspecting Shed Integrity
Creating seasonal checklists makes inspections easier. In the spring, look for damage caused by winter storms. Check the roof for missing shingles or leaks. Also, examine the foundation for shifts or cracks. In the fall, prepare your shed for winter. Clean the gutters and clear debris from the roof. Inspect the insulation to prevent heat loss during colder months.
Tips on Cleaning and Repairing to Extend Shed Life
Cleaning your shed regularly can prevent mold and moisture buildup. Use a mild soap and water solution to clean surfaces. A scrub brush can be handy for tough spots. For repairs, wooden parts may need sanding or painting. Rotting wood requires replacement to keep the structure strong. Metal components may need rust treatment; apply a rust-inhibiting primer and paint appropriately.
Pay attention to ventilation. Proper airflow helps keep the interior dry. Windows and vents should be cleared of obstructions. Without good ventilation, moisture can harm stored items and shed structure. Reinforcing weatherproofing around doors and windows also helps maintain durability.
When considering outdoor storage, ensure your shed remains functional despite harsh conditions. Check the roofing for leaks, and don’t skip over the foundation. Cracked or settled supports can lead to serious problems. Inspect joints and seals every so often. Taking steps early can save you time later.
Invest time in your DIY shed to extend its life. The materials you choose affect long-term durability. Quality wood, metal, or composite materials will perform better over time. When you construct the shed, focus on strong joints and connections. This will provide solid support against heavy winds or snow loads.
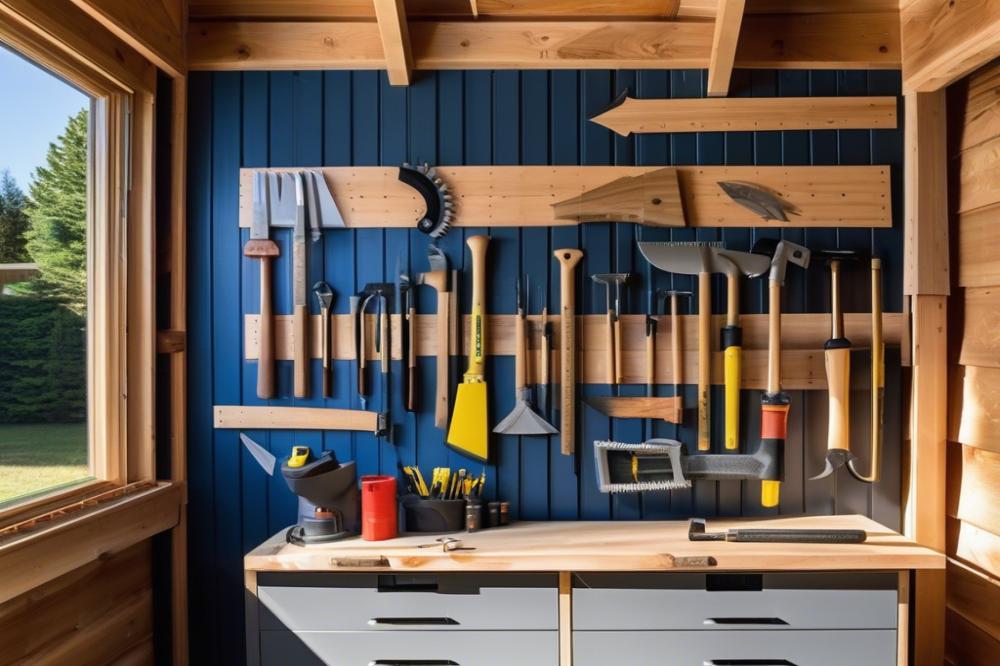
Utilizing Your Durable Shed for Outdoor Storage
Ideas for Effectively Organizing Outdoor Storage
Keeping everything organized in your shed can be challenging but rewarding. Use shelving units to store tools and supplies efficiently. Hooks and pegboards can hang items like rakes and shovels, saving floor space. For smaller tools, consider clear bins; these help you quickly spot what you need. Label each container for easy identification. Seasonal items, like holiday decorations, should be stored toward the back, while frequently used equipment should sit near the entrance. Regularly reviewing your storage will help you maintain an orderly environment.
How a Durable Shed Can Enhance Your Outdoor Space
An attractive outdoor storage solution can transform your yard. A well-built structure offers not only function but also aesthetic appeal. Choose colors and styles that complement your home’s exterior. Landscaping plants around the shed can further integrate it into your outdoor space. Proper ventilation will keep the inside fresh, while sufficient insulation protects your belongings from extreme temperatures. Regular maintenance, such as cleaning gutters and checking the foundation, helps you retain the shed’s charm and functionality over time.
Creative Uses for a Durable Shed Beyond Storage
Beyond just being a storage space, a sturdy shed can serve various purposes. Consider turning it into a small workshop for DIY projects. This dedicated area can inspire creativity and provide a quiet place to focus. Many people also convert sheds into cozy reading nooks or play areas for kids. If you are interested in gardening, you can transform it into a potting station complete with gardening tools and supplies. Seasonal gatherings can make use of the shed as a mini outdoor retreat. Customizing your space makes it genuinely yours.
Bringing It All Together
Building a shed capable of withstanding harsh weather involves careful planning and attention to detail. Choosing the right materials is vital. Durable options like treated wood and galvanized steel will provide lasting strength against wind and rain. Installing a strong roof is equally important. A sloped roof can direct water away from the structure, reducing the chance of leaks or damage.
Beyond the physical aspects, adding features like proper ventilation and insulation will enhance both comfort and longevity. Such choices form a solid base for dependable shed construction. These elements work together to create a resilient environment for your tools and gardening supplies.
Starting a DIY project may feel daunting, but it can also be exciting. Embrace the challenge with confidence. Every step you take—measuring, cutting, or assembling—adds to your skill set. Learning from mistakes along the way will only make you a better builder. Remember, every great builder started somewhere.
Investing time and effort into a well-constructed shed pays off in the long run. It will protect your belongings from the elements and serve as a functional space for various needs. A reliable shed can add value to your property and provide peace of mind. With the right approach, anyone can accomplish this. So gather your tools, and begin your journey today!